Vegetable

Spring has Finally Sprung in Central Iowa


The trees are finally leafing out, now to find something to plant in my hanging pots.


The neighbors crabapple is stunning this year, mine has lost most of it's blossoms already.


John tilling the east garden, most of which will be planted with native prairie plants that are useful for my natural dye plants.


Lettuce, strawberries, chard, basil, tom thumb peas, and arugula in this raised bed.


Various herbs along with three cabbage plants that I"m thinking of moving elsewhere, so I can plant more dill in this bed.

Livestock Tank as Raised Vegetable Bed


Got these lovely livestock tanks this afternoon from an old friend of John's.  They are delightful in their shape, patina, and the fact that they will keep my madder root contained!


In addition to the livestock tanks, John also got a yard of composted horse manure for our gardens.


He's beat from all of the shoveling and moving of topsoil and manure, but I'm thrilled to have everything in place for the growing season!  This weeks forecast is rain, rain, and more rain.


All three beds are now dressed with composted horse manure.

Raised Vegetable Beds 042713 Part 2


Round two of off loading the amended topsoil.

 
Almost ready for the compost!


This raised bed holds a full two yards of soil. 


"I bettter get some pesto this year..."  I'm betting dollars to doughnuts that's what's going through his mind when I took this photo!


My babies!!!  All grown locally in a local greenhouse, and here I said I wasn't going to have a large garden this year... well this time we're gardening smarter by laying down cardboard and then mulching those areas heavily.


Filled and already sporting some plants.


So far two plantings of chives, one dill plant, two peppermint (with the dark purplish black stems) three jalepeno's and three purple cabagges in this bed.  The soil temperature is around 60 degrees.

All three beds need new bird netting, to be added this week, and will be painted a lovely color called Copper Pot, looks just like terra cotta. 

I'm teaching an online basic introduction to indigo starting February 14th at the Natural Surface (which is now $29.95 a year to be a member)  http://naturaldyeing.ning.com I will be teaching both the instant indigo vat, and the standard chemical reduction indigo vats.  Cost for the class is $75 USD.

Untitled WIP


Natural dye painted and rusted silk organza over cochineal dyed wool batting.


I'm off on a couple of tangents, now that I know I won't be entering Quilt National.  Hopefully the next time QN rolls around they will have either changed the image requirements, of 300DPI or I will have a new camera capable of taking that high quality images.  Until then I'm content working in my studio.


If you'd like to learn more about dye painting fabrics with natural dyes check out my eBook Mark Making with Nature!

Composting Fabric and the Issue of Rot


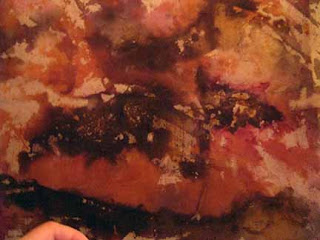
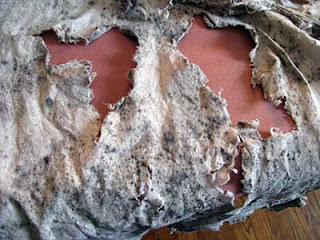
Yes even "I" have to deal with the issue of rot from time to time, I know many of you throw these pieces of fabric away, why I don't know but I have heard from many of you that you do so.   Me, well I'm weird in that I look forward to the holes, the tid bits scraps left in the washer and dryer, as they are layers in my mind. 

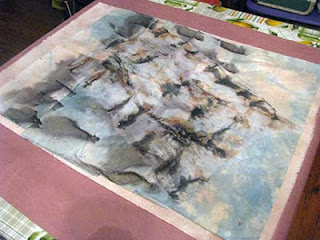
But what to do with the larger pieces that are thin and fragile?   Simple back it with a sheer iron on interfacing and go forward!  If need be used double sided interfacing and press it to a stronger piece of cotton fabric or canvas, when I've needed to do this I've used cotton flannel fabric as I love the way it needles for hand stitching.


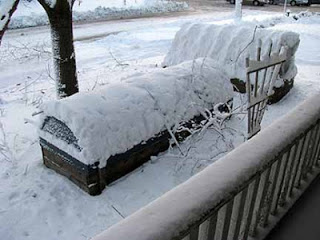
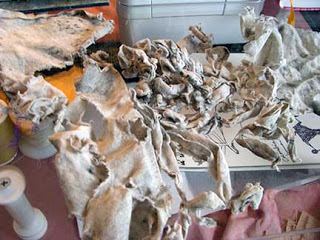
Some tidbits of fabric from the dryer, I have a pile I collected from the washer drying on a rack.


More holes and I can't wait to stitch them!

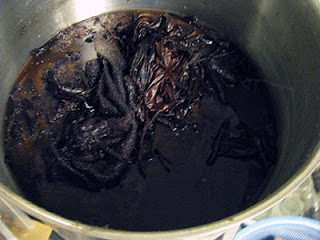
Later this evening this batch of fabric will be placed into a dyebath of cutch and walnut, once it's achieved the appropraite tone of "sandstone" I will wash it, dry it, press it, and then cut it down to size. After all the logistics of placement is figured out I may back it with a sheer interfacing such as Misty Fuse (my favorite) as I really don't like putting netting/tull over the face of my textiles.


If you want to throw your fabric away I understand, I really do!  It simply does not fit with your vision and I know how difficult it can be to work with fabric, fibers, yarns, threads, etc., that do NOT fit in with your vision.  If it's way cool rotted stuff just send it to me instead of throwing it away, I promise I'll turn it into something wonderful!

Oxidizing Fabric


Three four yard plus pieces of fabric that have been sitting out all winter and spring in the garden area waiting for me to do something, anything, with them.


Can't wait to see what this piece looks like after the washing machine, am hoping for some serious deterioration!  After a run through the washer then it's off to the alum pot and then time for a dye bath, am planning on something using walnuts and cutch for these pieces.