Fermentation

Fruit Fermentation Vat and Live Streaming


Attempted my first ever fruit fermentation vat this evening, notes about this are over in the Natural Surface forum, I liked it a LOT!  I streamed this session but was having a lot of issues with Ustream, so I will be streaming again tomorrow evening and from Google/YouTube Live instead of Ustream.  I will post a link tomorrow for the stream location.

I also worked with some earth pigments in this stream, it's recorded but will say I'm not sure how much of the recording has audio. 


I'm off to spend some quality time with hubs and my favorite pooch Angel.  See y'all tomorrow evening!


Spring is here!

Spring is here and now is the time to start digging out those old dye vats from last fall that have been hibernating in the basement. First up for this Springs Dye-In will be an Indigo Fermentation Vat. If you've never tried an indigo vat before now is a great time to do so! I'll be posting how to instructions along with video and more.
If you haven't checked out the Natural Surfaces Forum please do so http://naturaldyeing.ning.com/ We've been gaining members daily and natural dyeing discussions are picking up speed again now that the warmer temps have arrived

Updated Zine


I just updated The Natural Surfaces Zine with indigo dyeing instructions, I'll try to get more video uploaded to youtube on how to use a fermentation vat, now that my computer is working once again, in the near future. http://thenaturalsurface.blogspot.com/ The instructions are for the traditional indigo lye vat (NOTE you can substitute soda ash for the lye which is what I highly recommend).

Indigo Fermentation Vat

Natural Indigo Fermentation Vat
Copyright 2006
Kimberly Baxter Packwood


Natural Indigo Fermentation Vat Mini-Vat Instructions

1.0 ounce Natural Indigo Ground
0.5 ounce Madder Root cut into fine pieces
0.5 ounce Bran (Wheat works best, Oat will also work)
3.0 ounce Soda Ash
Stainless Steel, or Enamel, Pot. A plastic bucket may be substituted for the pot, be sure that has a tight fitting lid.

Place warm water, not boiling, into pot, preferably one that holds more than 2 gallons of water.

WARNING: Wear respirator when working with ground indigo, anything in powdered form will float easily in the air making it easily inhaled. This is not good for your lungs!

WARINGING: Soda Ash is highly caustic, wear gloves and dust mask when handling soda ash. Avoid contact with skin.

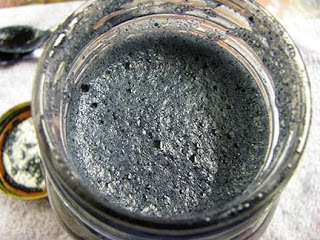
Dissolve ground indigo in warm tap water, enough to cover and make a rough paste.

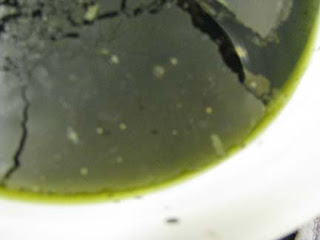
Note: The ground Indigo will float at the top of the vat if just thrown into the water make your paste first. The indigo at this point is not completely dissolved, once introduced to the vat; it will dissolve after a few days in the vat.

Add madder root, bran, and soda ash to the warm water stir well then add indigo paste to the vat. Cover, but not tightly, and apply heat source.

Stir the pot once, or twice, a day during the reduction period with one gentle stir. If you stir the vat too often this will introduce Oxygen into the vat.

Depending on where you live, i.e., temperature and humidity levels, the vat can take anywhere from 5 – 10 days to become viable. By viable I mean ready to dye fibers.

Fermentation vats need to be kept warm while reducing. I keep my vat, a stainless steel pot that is covered with a lid, in my studio oven (gas) where the pilot light is continuously on, about 98 degrees F.

The vat needs to be kept at body temperature during the reduction phase.

If you do not have a dedicated oven, I recommend using either a heating pad, with a temperature control knob, or a high quality fish tank heater with digital temperature controls.

Chopped Madder Root

Wheat Bran

Madder Root added to warm water in bucket. Initially it floats at the top of the water’s surface.

The Bran now added to the vat. The bran floats on top of the madder root until they have been sufficiently stirred together, eventually sinking to the bottom of the vat.

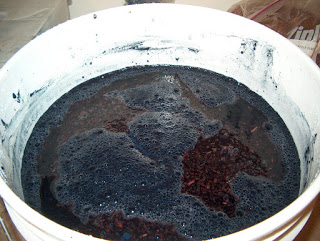
Soda Ash has now been added to the vat. The vat has a foamy look from the bubbling action of the soda ash. The mixture has been blended, to ensure that the soda ash does not solidify on the bottom of the bucket.
WARNING: Always add your acids and bases to water, never the other way around! Doing so can result in harmful reactions that can cause injury.
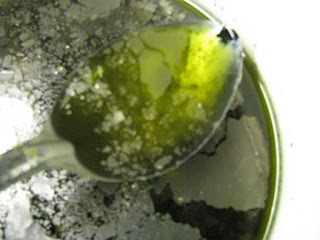
Natural Indigo added to the vat. The Madder and Bran are still floating at or near the waters surface. The indigo while made into a paste, does not want to dissolve in the water as you can see from the globs hanging on the sides of the bucket.

Indigo Dyeing using a Lye or Soda Ash vat

Dye Materials Needed

1 ounce Indigo extract or Indigo chunks
1 cup Soda Ash or Lye (I HIGLY recommend using Soda Ash NOT Lye~!)
2 Tablespoons Thiourea dioxide or Thiox
Water

Equipment needed:

Respirator – you only get one set of lungs! Wear a respirator when handling dye powders, mordants, and dye assists~!
Gloves – wear heavy duty kitchen or dyeing gloves when handling the indigo ingredients (See safety Instructions Below)
Stock Pot 18 quarts or bigger, can be Stainless Steel or Enamel the indigo vat will react with aluminum so I don’t recommend using aluminum pots for creating the vat.
Scale for weighing dyes and chemicals – again studio dedicated!
Measuring spoons, measuring cups, wisk for stirring
Jar – wide mouth pint jar for making indigo paste
Spoon, studio dedicated, for stirring the vat
Tongs for retrieving your fabrics, fibers, etc.
Lingerie bag for small items you wish to find in the vat again the bag makes them easier to retrieve
Water for your vat, rinsing, and for oxidizing
Vinegar – helps to restore the pH balance of wool and silk fibers/fabrics
pH papers/strips for testing the pH of your vat.
Heat source
Clothesline for hanging fabrics onto to help fabric oxidize faster.


Natural Indigo Chemical Reduction Mini-Vat Instructions:

1. READ Safety Instructions before Beginning the Indigo Vat!

2. Fill your vat container with water you don’t need to heat the vat at this point. ALLOW TO SIT OVERNIGHT, doing this allows the oxygen to dissipate from the vat.

3. Place 1 ounce Natural Indigo powder (if you are working with hard chunk indigo it will have to be ground down first) into a suitable container.

4. Add just enough hot water until you get a paste – preferably lump free (I use a dedicated wide mouth pint jar for this solution.

5. Add soda ash or lye to the vat water - NEVER add water to your soda ash or lye ALWAYS add the soda ash or lye to the water!!!


6. Slowly add the indigo paste to the vat solution

7. Stir to dissolve NOTE this may take quite a bit of stirring, heating the vat at this point also helps with dissolving the paste faster.

8. Next add thiox to the vat solution stir very little so as to avoid adding Oxygen to the vat.

9. DO NOT BOIL YOUR VAT as this will cause bubble formation and will introduce Oxygen into the vat.

10. REMOVE HEAT after 30 minutes

11. Cover vat and allow to sit until reduction is complete.

12. Reduction is complete when your vat turns a yellow to yellowish pea green color.

13. If your vat is still blue after 24 hours then you have too much Oxygen in your vat add thiox to the vat in small increments, a few grains of thiox at a time, to further reduce the vat.

14. If you reduce the vat too far then gently stir the vat with one or two swirls of the spoon and allow to sit for 30 minutes.

15. You will need to test the pH of the vat to see if the pH is correct

16. pH should be 10.0 – 11.5
· cottons 11.0-11.5
· wool and silk 10.5-11.0 preferably closer to 10.5

17. Adjust pH by adding small amounts, half teaspoon at a time, of soda ash to your vat, even is you created a lye vat do NOT add more lye to the vat at this point.