Paper

Dried Gelly Pens and Journal Pages


My gelly pens seem to have dried out somehow, there's still ink in the pens but the pens won't write. I've tried the water method to get the pens to work again but it didn't work.  If anyone has any tried and true techniques for making the gelly pens write again please let me know!


Still cutting papers for the soon to be created 60 Day Bird Challenge Journals.


Today I went through my scrap booking papers and discovered some really beautiful papters in my stash.  Those have now been cut down to size, 6x9 inches (and this is a 3+ inch stack of various papers!), and are ready to be incorporated into new journals.

Junkin in June


More washi tape, from my favorite source Pixi's in Gilbert, IA. I have to admit that keeping a personal journal has become a lot more fun now that I've started incorporating all of those elements I've been collecting, but had no place in my regular artwork!  


Picked these up from one of the vendors at JB Knacker in Gilbert, IA this afternoon during their annual Junkin in June event!  


My watercolor issue resolved now that I've been reminded that I own sets of Caran D'Ache's Aquarelle watercolor crayons as I wasn't looking forward to replacing 20 year old dried up tubes of watercolor paints anytime soon!  Now that I'm using my aquarelle's again I can take my time and buy the colors I need preferably on sale as sets or as single tubes.

Deconstructed Screen Printing with Natural Dyes and Stencils!

Materials List: 
Silk Screens
Squeegee for Silk Screen
Stencils
Natural Dye Extracts
Gum Tragacanth Binder
Containers to hold natural dye extracts/binder I used paper cups.
Plastic Spoons
Newspaper
Masking Tape
Fabric or Watercolor Papers

Products Used:

Links:
How-to make the Gum Tragacanth Binder Video

I am here today to show you how to use stencils with a silk screen and natural dyes for screen printing.


Instructions:
Mix up Gum Tragacanth with Natural Dye Extracts; see video for specific amounts and mixing instructions.  I made a little card with the names of the extracts I was working with and daubed a bit of the color next to each name, for future projects.

The Natural Dye Extracts blended with the Gum Tragacanth are now ready for printing!

Most silk screens won’t be the same size as your stencil, however, I have an easy fix for this problem.   Measure your screen and your stencil and then block off the required space for your stencil by taping news print to the FRONT of your silk screen.  Then tape your stencil to the front of the screen making sure to overlap the stencil onto the newsprint.


Blocked off silk screen, as seen from the front.


Blocked off silk screen as seen from the back.


Black Birds in Tree Inverse taped to the FRONT of the silk screen.


Place your natural dye binder medium onto the screen, towards the edge, this is known as “the well”.  Using your squeegee pull the medium in a firm manner across the screen, once you have reached the other side, pull the medium back towards yourself, do this several times adding more of the natural dye binder medium if needed until the color on the screen looks even.


Gently lift up the silk screen from your substrate, I used 300# cold press watercolor paper for this sample.


For this sample I used the same stencil and screen to print the image onto cochineal dyed cotton fabric that I had surfaced using my hand and earth pigments and fabric paint.


Printing onto cochineal dyed cotton fabric.


If you wish for your fabric images to be free of bumps, etc., tape the fabric to your surface to keep it from moving, etc., while printing.  I prefer an organic and whimsical look and therefore don’t tape my fabric to my table.

Some Bird Art


Little medallions with featuring Black Birds in Tree, alcohol inks to the left, shiva paintstiks to the right (prussian blue)


Experimenting with copic markers and gelli pens on scrap booking paper.  Barely noticeable at the bottom are three of the washi tapes I purchased last weekend.  This will probably end up as the cover for my "new to me" journal.  Crow is from my Three Crows Stencil.

More birds to come, I'm working on a major project (all new work for an upcoming solo show) the big reveal will happen and soon, until then here's my latest samples to see how the various mediums work with the stencils.

Creating a Strategic Objectives Journal for 2014


Am working through Lisa Sonora Beam's "Creative Entreprenure" book again, last time was 2008/09, and am now just creating my Strategic Objectives Journal.  I have to say this has been a lot of fun this time around, it especially helps that I now understand most of what she discusses, this due to five years of reading and researching how to run a business. (Raven Stencil available soon!!!)


And what would a journal be if I didn't personalize it with my own artwork?  Blackbirds in Tree from StencilGirl Products stencil with FolkArt Indigo paint for the first layer of this journal section.  I found these old manilla folders in hubs office, when I say old we're talking 30-40 years old here, and am repurposing them for my new journal. 


How I dealt with the uneven edge of the manilla folder, I simply placed a piece of old reciept journal paper under the folder edge. 


The journal paper freshly stencilled.  I'll add more layers to this piece of paper and glue it inside of the journal somewhere.  More later, I have more birds to paint now that the first layer has dried, while I think about my objectives.

Black Friday Sale!!! eBooks, DVD's, Academy, and More!


Black Friday Sale 2013!!!
 
DVD Set $69.95
Digital Download $39.95
eBook Combo $19.95
 

Black Friday Membership Sale!!!
$299.00 (non-refundable)
Join me and other artists in 2014! 
We will be taking fabric from ordinary to extraordinary!!!
 

Stitched Stories, Mix Media Prints,
Fabric Bundles and More!!!


Part One - Black Birds in Trees Harvest


With a round object of your choice (I used a 6" plate) and a soft pencil (HB) draw a circle on your 9x12 sheet of watercolor paper.


Using a texture or geometric stamp, and waterproof ink, add some texture around the circular area.
 
 
Now fill the circle with some yellow paint, I used Folk Arts Medium Yellow.


Using a thin layer of grey paint the background.


The thin layer of paint will allow the background texture to show through; allow paint to dry completely.


Now apply alcohol inks and in random manner.  I spritzed the moon area with butterscotch, lettuce, and red pepper.


Not to worry the inks will dry way lighter than what you see in the image here! 


About half dry now, it will become lighter still!


Once the alcohol inks are dried take a baby wipe and in a swirling motion remove most of the ink from the moon shape on the paper.


This gives you a realistic moon shape and fall harvest coloring.  Not all of the ink will wipe away and this is fine you don't want it all to wipe away.


If you need to amp up the color for the background now is the time to do so.  Here I recharged the alcohol ink using some additional inks and a water bottle.  Spritzing with water will cause speckling, etc., to occur giving you more texture.


Place stencil of choice onto background, and using dry stencil brush techniques push the paint through the stencil onto the paper.  Here I'm using my stencil Black Birds in Tree which is available through StencilGirl Products!


Too much paint will cause the paint to go under the stencil and well creates a HUGE mess, but this piece can and will be redeemed!  Folk Art Paint - Licorice


And because sometimes I am a bit of a perfectionist, yes me, I went and created a second piece the steps of which are above, just to see if I could get the stencil portion correct!


And I managed to keep the paint in the lines this time!  Ok, the paint should be dry now I'm off to add more layers to the first version of this piece to see where it takes me, oh and to cook dinner!

Stay tuned for Part Two!

Art Crawl Iowa Virutal Studio Tour Update!

What you will need to participate in this years
Art Crawl Iowa Virtual Studio Tour:

  1. Currently live in Iowa
  2. A blog and/or a website where you will post creative photos of your studio(s)
  3. Brief artist statement and bio about yourself and your work.
  4. A couple of images of your artwork.
  5. List of galleries, etc., where we can see and/or purchase your artwork.
  6. Contact email
  7. Send me a link to your website/blog/page and I will add it to the list of participating artists here on this blog next Friday at  prairiefibers@hotmail.com
If you would like to participate in Art Crawl Iowa 2013 email me at prairiefibers@hotmail.com

Art Crawl Interview with Steve Hosch


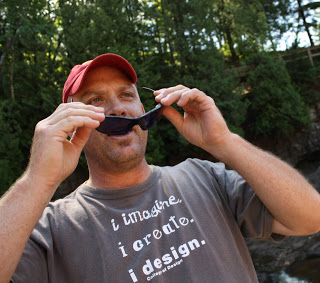
This weeks interview is with Artist Steve Hosch!


· How did you get your start as a professional artist?

While I’ve made art my whole life, I’d never made an attempt to market and sell my work until a few years ago. I really don’t know what inspired me to get serious about my art at that time. Mid-life crisis? Turning 40 looming around the corner?

I was confronted with a pile of birdhouse gourds I’d grown the year before taking up space in my garage. Throw them out or do something with them? I cleaned them up, drilled holes in them, and used my wood-burning tool to “draw” some simple designs. Needless to say, I quickly tired of making birdhouses, so I bought some other varieties of hard-shell gourds and began experimenting. I bought a Dremel and played around with relief carving, I messed around with dyes and painting techniques, and I even taught myself how to coil pine needles. Eventually I got rather adept working in this medium, turning plain old gourds into bowls, vases, pitchers, and masks. Pushing my fear of rejection aside, I contacted Mike Miller at Gallery 319, showed him a few of my pieces, and asked him if he’d be willing to display and sell my work. He agreed, and for the next five years I made and sold—at Gallery 319 and Longbranch Gallery in Mineral Point, Wisconsin—a lot of gourd art.

After about five years of gourd art, I grew increasingly bored with the medium. Around that time I ran across a website called Loving Mixed Media, an educational site devoted to nurturing artists through technique experimentation. By way of LMM, I discovered assemblage and collage, and I’ve been working primarily in those mediums ever since.

• How long have you been working as a professional artist?

Since 2005.

• What are you currently working on?

A good portion of my summer was devoted to building up a small body of assemblage work for a show I’m doing this fall (September 7-October 20) at the Plymouth Congregational Church gallery in Des Moines. Lately, though, I’ve been working on experimenting with collage.

My assemblage work can be fairly time-consuming, which generally translates into me needing to set higher prices for that work. A lot of people have shown interest in my assemblage pieces, but that interest, lately, hasn’t resulted in sales. I’m not naïve; I understand the times are tough and people don’t want to plunk down a lot of cash for an assemblage.

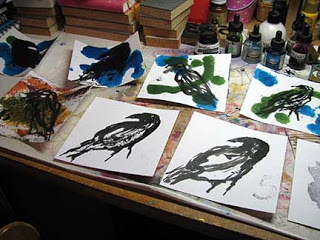
That said, I spend significantly less time creating my collage pieces. In fact, the process is a refreshing change; I purposefully work quicker, more playfully, allowing the collage elements to sort of come together on their own. Hopefully, in a few weeks I’ll have a small collection of collage pieces ready to go. They’ll be more modestly priced than my assemblage work, so I hope people will take them and give them a good home.
 
 
• Your current body of work depicts?

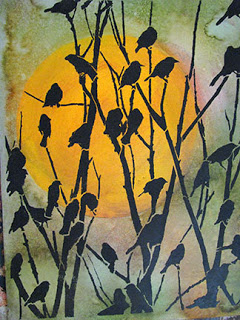
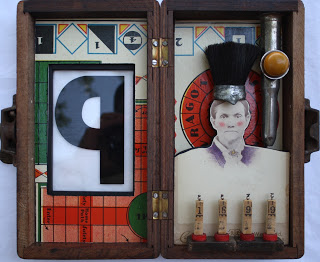
Currently I’ve been using a lot of human-based imagery, such as vintage photos and anatomy book illustrations. I try to depict the relationship of humans to the environment around them, whether that’s the natural environment or human-created “environments” and conditions. I like to also incorporate images of the man-made, such as machinery or maps, in my work; I’m attempting to depict humanity’s love affair (and I would say, an oftentimes unhealthy love affair) with technology.
 

• What materials do you work with and why?

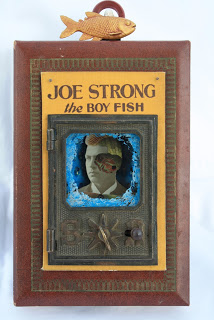
For my assemblage work, I’ll work with pretty much any material I can get away with. My “studio” (really just a corner of my basement) is heaped with stuff—cigar boxes, old frames, rusty tools and other metal bits, bones, porcelain doll parts, old game boards, and the like—that I’ve collected. For my collage work, I love vintage ephemera: old books, photos, advertising, and the like, much of it over 100 years old. It’s not just the images that catch my eye; it’s also the paper itself.

For the most part, the materials are readily available and relatively inexpensive—although with the popularity of all things vintage and “retro,” this is becoming less the case. There’s just something about the patina of old stuff—rusty metal, chipped paint, stained paper—that delights me. I like the thought that I’m giving it, a la Dr. Frankenstein, new life.

• What excites you about using the materials you work with?

It’s the transformation process that excites me. I really geek being able to take some mundane piece of rusty junk or an old photo or a page out of some out-dated biology text and transform it into some it was never meant to be—a work of art. Two of my passions are art and history, so I guess my work is simply an intersection of those passions.

• Tell us about some of the processes you do in your work

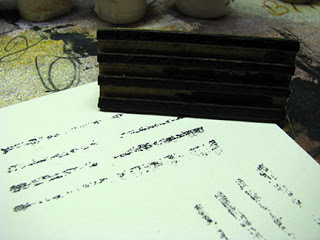
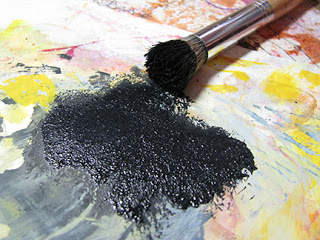
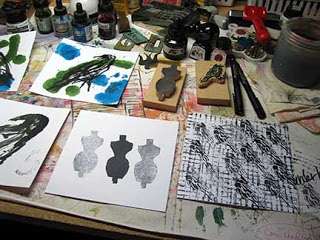
One of my favorite processes—I use it quite often in my collage—is image transfer. I use a photocopy, either on paper or on a transparency, and transfer it onto another surface with matte medium. It’s a cool technique because it offers the ability to create layers in my work. I can transfer an image over the top of another image, but the bottom image is still visible.

• When you make a piece where does the inspiration come from?

That’s the million-dollar question, isn’t it? Honestly, I don’t know. It may sound like a cop-out, but most of the time I really don’t know where the inspiration comes from. There are corners of my brain where stuff is stored that only sees the light of day when I sit down at my worktable. It comes across as goofy-sounding, but the junk I gather for my work “speaks” to me; I just let it tell me what to do.

• Do you make art every day?

Sadly, no. I’m a high school special education teacher, so in the two-and-a-half months of my summer, I do make art pretty much every day. However, during the rest of the year, I’m lucky to make art once a week.

It’s a Catch-22 of sorts. My art is my lifesaver; it’s a much-needed catharsis to the stress and frustration of my “real” job. However, for the nine-and-a-half months of the year when I most need it, I’m too worn-down and burned-out to do it consistently.

• What other artistic interests do you have?

I do enjoy writing. Over the years I’ve had a couple of short pieces published in some Midwestern magazines. Lately, though, my “writing” has been reduced to my blog—and the occasional Facebook rant.

• Tell us something that most people don’t know about you that they would find interesting?

 Growing up in Northeast Iowa—just 20 miles from the Mississippi River, where I loved watching tugboats guide huge barges through Lock and Dam #10—one of my first career goals was to become a tugboat pilot.

Artist Statement:

For me, my art is the metamorphosis of clutter. First, it’s about literally transforming clutter. I gather seemingly mundane objects and ephemera and bring them together to form works of art. My art is also a figurative transformation of clutter. I use the clutter-of-life that occupies space in my head and harness it to make art. “Ask questions and seek answers,” a friend once advised. At its core my art is an attempt (often dark, usually satirical) to ask questions and push the viewer to seek answers—and every so often butcher one of society’s sacred cows.

Bio:

Even though art's always been a big part of his life, Steve still has a difficult time calling himself an "artist." Other than the two years spent as a frustrated graphic design major at Iowa State University, he's a self-trained artist. Steve received his bachelor of science degree in history in 1989 and took a job as a museum technician at the Herbert Hoover Presidential Museum, where he was involved primarily in exhibit design, construction, and maintenance. In 1991 he returned to Iowa State to attend graduate school, eventually earning a master's degree in education. Since 1992 his "real" job (that which supports his art habit) has been as a high school special educator, a career choice that requires the much-needed catharsis provided by his art. In 2005 Steve began creating vessels and masks made from hard shell gourds. However, in the summer of 2010 Steve turned his creative attention to assemblage and collage, mediums he continues to explore.


"Art washes away from the soul the dust of everyday life." --Pablo Picasso