
Corn 2016
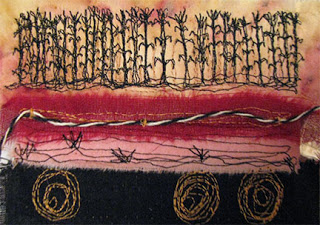
Corn No. 49 from 2012
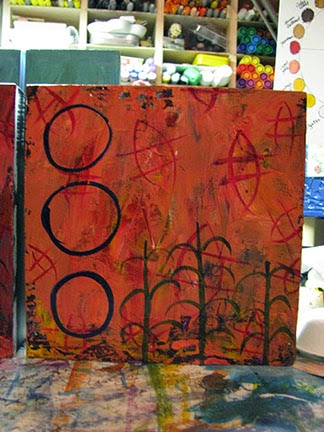
Just when I thought I didn't have anything more to say about Corn, I was asked to participate in a three woman show come January 2017. I was asked if I would be interested in creating some new Corn pieces for the show.
I said yes, all the while thinking I'm done with Corn, why am I saying yes?
Well it turns out I'm not done with Corn. The subconscious wants what it wants, and it was clearly wanting Corn.
Yesterday I managed to purchase the stretched canvas upon which my new pieces shall be mounted, and for a really good price.
Upon that purchase all sorts of imagery of finished pieces popped into my head. This time I'm going for a more earthy approach, using actual soil, clays, ochers, and earth pigments in combination with indigo, rust, and natural dyes (yes I'll be dyeing with corn husks, leaves, cobs, etc, with just a touch of digitally printed fabrics that lends to the modern digital tech age today's farms are becoming!
Stay tuned!!!
Mark Making with Nature eBook Set MEGA SALE!!!

Black Friday thru Cyber Monday MEGA Sale
Titles Include:
- Mark Making with Nature
- Rust and Clay Dyeing
- Compost Dyeing and Other Fermentation Dyeing Techniques
- Getting Started with Natural Dyeing
That 's 172 pages of how-to dye, paint, and print with natural dyes for $3.95! Own them today!
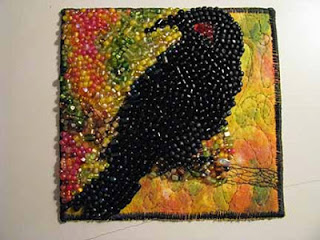
More Crow Panels in Progress

If I counted correctly there will be a total of 26 panels in this new series, and once these are done I'm off to rework some encaustic pieces from a few years ago to include my crows, Queen Anne's Lace, and the marks I've been putting in these pieces.

I wasn't sure how these pieces were going to come out, while they have similar colors they are not exactly the same... but where's the fun in everything being the same, right!

I've allowed the distractions of the past few weeks beat my confidence levels down, it doesn't help that I've had a nasty head cold, or that my dad has had ongoing health problems.

I did get to see my brother last Monday, the first time since my mom died in 2005, they visited for a whole hour and forty five minutes before they had to leave again.

So tomorrow it's back to drawing and painting crows, ravens, and blackbirds and if they are horrible then they are horrible.
But, the secret to mastering anything is to keep at it until... until well you've mastered it!

With that said I've decided to seriously edit the information I've compiled for my Natural Dye App, and just create the app! A simple app that is accurate and usable is much more enjoyable than one that doesn't exist!!! Feet of clay, I think that's the name for this syndrome, the whole "what if they hate it???"

There will always be haters, and they are not my audience anyway... so onward I will push this week!

Deconstructed Screen Printing with Natural Dyes and Stencils!
Materials List:
Silk Screens
Squeegee for Silk Screen
Stencils
Natural Dye Extracts
Gum Tragacanth Binder
Containers to hold natural dye extracts/binder I used paper cups.
Plastic Spoons
Newspaper
Masking Tape
Fabric or Watercolor Papers
Products Used:
Links:
How-to make the Gum Tragacanth Binder Video
I am here today to show you how to use stencils with a silk screen and natural dyes for screen printing.

Instructions:
Mix up Gum Tragacanth with Natural Dye Extracts; see video for specific amounts and mixing instructions. I made a little card with the names of the extracts I was working with and daubed a bit of the color next to each name, for future projects.

Most silk screens won’t be the same size as your stencil, however, I have an easy fix for this problem. Measure your screen and your stencil and then block off the required space for your stencil by taping news print to the FRONT of your silk screen. Then tape your stencil to the front of the screen making sure to overlap the stencil onto the newsprint.
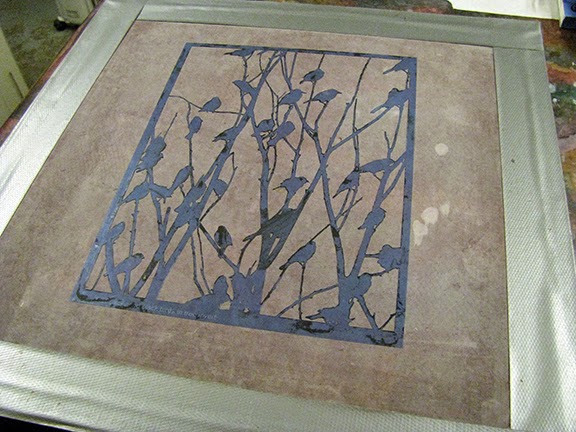

Blocked off silk screen, as seen from the front.

Blocked off silk screen as seen from the back.
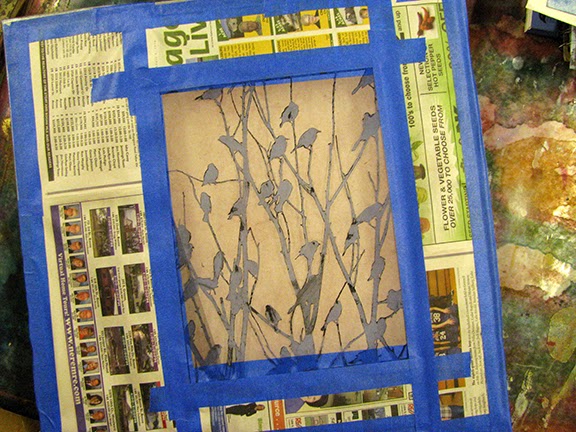
Black Birds in Tree Inverse taped to the FRONT of the silk screen.

Place your natural dye binder medium onto the screen, towards the edge, this is known as “the well”. Using your squeegee pull the medium in a firm manner across the screen, once you have reached the other side, pull the medium back towards yourself, do this several times adding more of the natural dye binder medium if needed until the color on the screen looks even.

Gently lift up the silk screen from your substrate, I used 300# cold press watercolor paper for this sample.

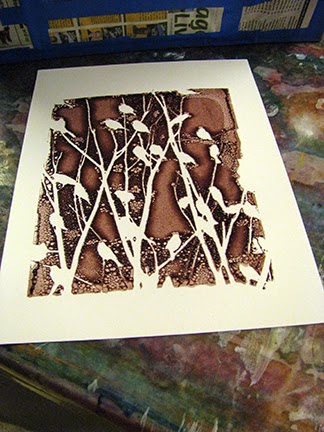

Printing onto cochineal dyed cotton fabric.


Mold
This is what happens when one does not use heat in the 30 day dye bath, I need to get the temp up to 78F, which is still cold, but warm enough to prevent mold formation.

I will be adding fish tank heater tomorrow to the dye vat, AFTER I skim off the mold.
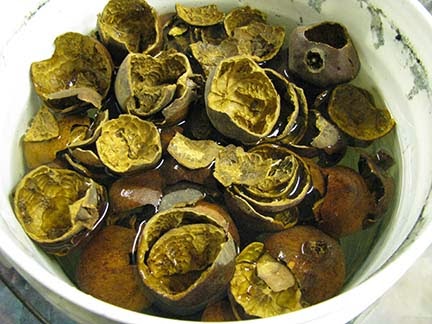
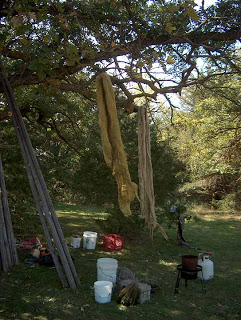
30 Day Cold Dye Pomegranate Vat
Day 1

Day 2
January 2014
There WILL be some of this happening in my wet studio next week! Natural dye extracts painted onto silk fabrics.
Not Permanent
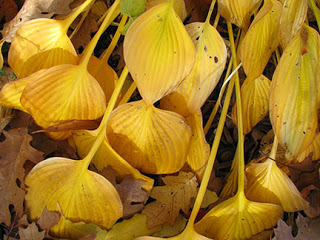
Hostas do not provide a permanent color but they certainly inspiring!

Gelatine Plate Printing with Natural Dyes

This is from several years ago, I have a geliplate my best friend Brenda got me for xmas last year that I really, really need to use! I'm thinking some earth pigments and my Black Birds in Tree stencil onto fabric for starters. The plate in the above photo I made myself, here I'm using lace and trims as resists for the print which I made onto fabric.

Cotton fabric, that I do believe I compost dyed, osage orange on the gelatin plate with some lace trims gave a nice resist pattern. After curing and washing the osage orange color is about 30% of it's orignal brightness on cotton fabric. Now to find this piece of fabric in my stash and audition some threads for stitching.
Fall Colours
September is drawing to an end, so thought I would post some fall colours!
Rust on hand dyed cotton fabric.
I do believe I dyed this with MX dyes back around 1994, before I became allergic. Anyway, I love the colors of this piece, as the leaves start to change I will take some photos, do some color studies and use some of this fabric as it's wanting to be stitched and oh so badly.
Common Phlox
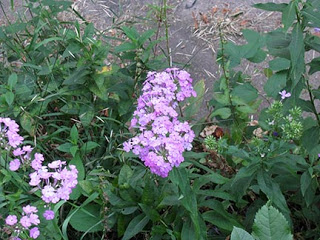
Common Phlox Phlox divaricata
Not worth my time collecting to use in a dye pot, any color it would yeild would fade in a matter of days, if not hours. The stems would yeild a weak yellow at best. But given the current extreme heat Iowa is experiencing it is one of the few plants that has survived in my garden without needing watering.
Oliver's Run Part One
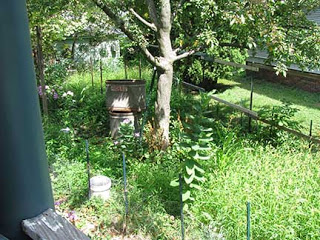
Before, this is my garden that literally went to seed and to the weeds, this summer. John mowed almost everything down, and now there's room for the new, to Oliver, dog run. Our neighbor, Praise God, is giving us their dog run to add to our dog run so it'll go from being 12x16x6 feet to that size plus another 12x8x6 feet, I think it may actually be larger than that, we'll know for sure tomorrow once we have it all set up.
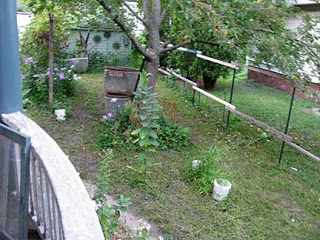
After, a few native plants were spared the lawn mower blade. Specifically the milkweed and the two white plastic buckets, which have their bottoms removed, are protecting my prairie dye plants.
Will post more photos tomorrow once we get the dog run up and usable.
Indigo Dye Blog Crawl - Update
I will be listing participating blogs this evening!
Natural Dye Blog Crawl
I'm putting together a natural dye blog crawl for next weekend, if you'd like to participate let me know @ prairiefibers@hotmail.com I will list all participating blogs here on my blog starting Midnight (Iowa Central Time) July 27th!
Marigold
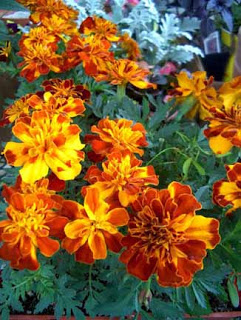
Common Marigold - Tagetes sp.
Golds to browns using cold water extraction method.
Coreopsis
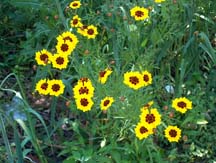
Dyer's Coreopsis
Oranges to reds
Stable
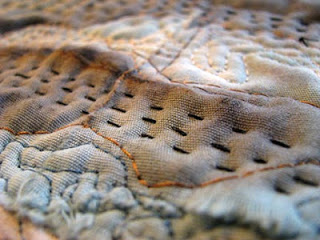
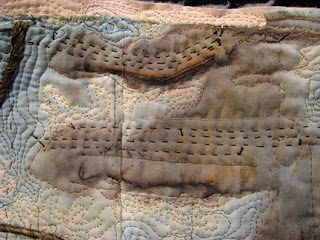
Bjorkboda Progess
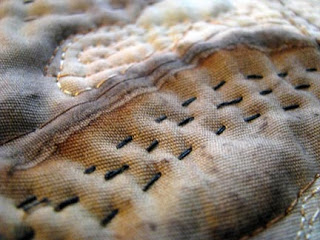
I've started stitching on this piece again, this time with a renewed vision.
WIP - Crow on Yellow 052313
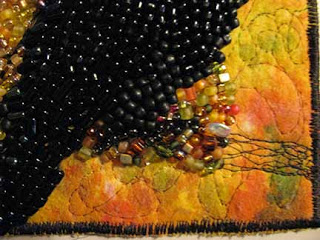
I worked a bit more on the crows feet last night and started this side of the branch it is perched upon.
Today it's all about finishing the app, which is taking longer than I anticipated simply because as I go through my old natural dye nots I find myself adding more plants and more categories about the colors, fastness, etc. Phew... that was a long sentence!
It's starting to look like a bird!
Rabbitbrush and Sage Dyed Wool
Rabbitbrush and sage dyed wool, 2007, in an iron pot.
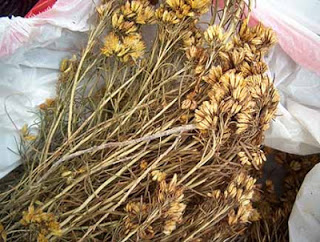
Dried rabbitbrush from western Nebraska eastern Wyoming area.
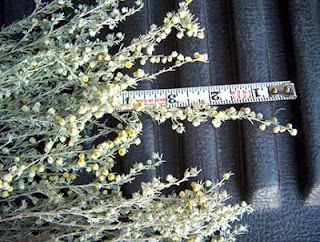
Sage in bloom from western Nebraska.