dyes

Registration NOW OPEN for Earth and Sky From Sketch to Stitch

Earth and Sky: From Sketch to Stitch

A Mini Master Class click here to learn more!

Earth and Sky is an Eight Week Mini Master Class divided into 2 Four Week modules with a One Week break in between the two modules.

Module 1: Sketch, Draw, Paint, Surface Design

Break Week

Module 2: Sketch, Surface Design, Stitch, Embellish

Class begins April 15th! 

Lifetime Access to the Clas

s

NOTE: Because of the intensity of this class I am limiting the number of spaces available to 20!!!

Looking Back...

Shroud No. 1
Cotton Fabric
Natural Dyes
Rust
Time
Air
2002


I started out with several yards of white cotton fabric that I wrapped around a pile of leaves, twigs, stones, etc. into what looked like a swaddled child.


And there it sat, for a couple of months, in a rusty wheel barrow filled with rain water and vinegar.


And then it lived on my concrete driveway for a couple of months.  


The fabric bundle unwrapped.


Detail of the marks, stains, etc. 

Fiber Purge Begins!!!


Tomorrow I shall be listing in my new ebay store, new because they apparently closed mine due to not using it for five years, wool and silk fibers of all types!  I also have gobs of needle felting and knitting tools I'll be divesting of, as I am now going in an entirely different direction with my studio.


Mohair in several color ways.


Loose hand dyed wool fibers of several varieties including llama and alpaca.


And I will also be divesting of some of my natural dyes, not the indigo or cochineal (yet anyway).

Studio Purge Part One

Over the next few days I will be posting not only images of my studio spaces, for accountability purposes, but also to let you know what is available.  I will be selling some items check out the studio purge tab for daily updates, and others will go to new homes for the sole cost of shipping!


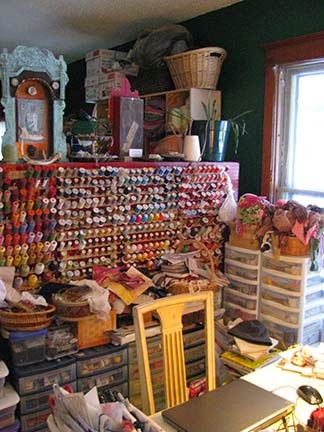
In thinking about my "brand" I've had to make a decision as to which mediums and colors I will be working with and "why"!  This wall here contains beads, findings, and all sorts of mixed media objects that is and should be heaven for most artists.  Well this was true until today when I got into the last fight I ever want to have with myself over studio space EVER again!

Yes that is right, you know every time you scream in frustration because you can no longer move in your studio space, or find that book you need to finish a project at the last hour, you are fighting with yourself!

Stop fighting with yourself!


More beads, jars of silk cocoons, buttons, bells, baubles, and all sorts of nummies.  The crates above are filled with mixed media papers, findings, Angelina fibers, pine cones, silk carrier rods, and who knows what else.  Well I'm planning to start excavating tomorrow so we will soon find out what else lies within those crates.


Far shelf, more beads, findings, jars with little bells in them... you get the picture.  Foreground that's supposed to be my sewing table and right now it's loaded with drawing and painting supplies.


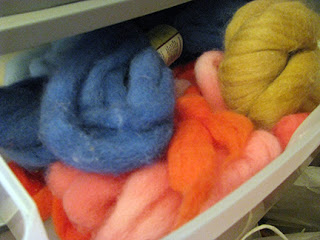
The other side of my sewing table.  The plastic drawer stuff (to the south of the table) are filled with vintage, antique, and somewhat modern laces, threads, buttons, ric rac, you name it, oh and a ton of handspun yarns from fibers I carded and dyed myself and in some cases even acquired from local sheep I used to sheer.


The wall of thread!  And those little plastic drawer organizers, if you guessed filled with beads you'd be correct.  And they are also over flowing with embroidery floss, pearl cottons, and the like.


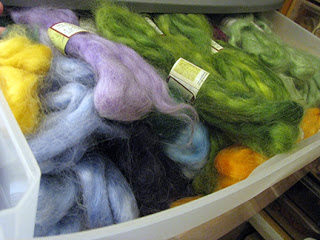
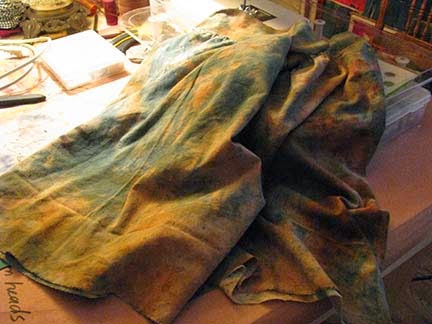
More thread, and those plastic tubs are filled with... if you guessed vintage and antique trims you'd be correct! Two of the tubs are also filled with natural dyed wool, silk, and cotton fabrics.  All of those baskets and tubs on top are filled with more fibers, more threads, and more mixed media objects, seeing a theme here  yet???


And sweeping past the entrance to my sewing room... More threads under the clock.


More fabric, more threads, more fibers, and no place to put finished artwork!  This is the north wall in my sewing studio and I want ALL of this stuff to go bye bye, with the exception of the shelf (you see the side of it here) with the clock.  My goal is to put my drawing table and new flat file cabinet (that hubs is building for me) on this wall.


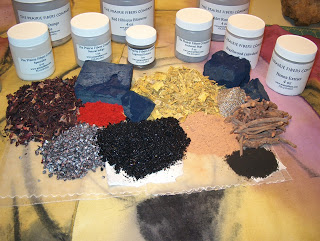
Finally the corner where I started, the NW corner of my studio.  Again more fibers, more threads, more fabric, all dyed with natural dyes.  Oh and a ton of knitting supplies and latruador that I'm never going to get to in this life time.

Stay tuned for Part 2 tomorrow the area of my studio known as the "overflow" area.

Mark Making with Nature Video Series


Mark Making with Nature Video Series

There have been a lot of changes in the past year, I took down my academy, and in 15 days I will be taking down my Mark Making with Nature Video Series.  I need to find a new  host for my video series as I'm not overly happy with Vimeo.  I'm also thinking of redoing the entire video.

So here is your last chance to own this particular video series, to learn how to screen print fabrics with natural dyes, and much, much more!

In with the Old


French Silk Dyes on Haboti with Gutta Resist circa 1994/95

I made this piece in a fabric dyeing class back in the dark ages, Priscilla Sage was my instructor at the time and I was also taking a 2D Mixed Media course with Jan Friedman which landed myself and a dozen or so of my classmates in a local cemetery for some black and white photography inspiration.

So yes those are supposed to be tombstones I painted onto the fabric.  I never did anything with this piece but this weekend during the open studio one of my visitors proceeded to go through my fabric stash, yeah she and her friends REALLY did do that, and she pulled this beauty from the stash.  

Of course they all wanted to know why it was wadded up in an old suitcase with dozes of other pieces of silk fabric instead of perfectly folded and pressed into squares. It's very simple, silk is like your hair, so just lightly crumple it and drop it into the place you wish it to live, do not press perfect lines onto your silk unless you wish for them to be permanent.

I will spritz this piece of fabric with some room temp distilled water while it hangs, and the wrinkles and crinkles will gently disappear.  After that I think I will back this piece with some batting and a cotton backing and then add some stitching, or not.

Experimenting


Stenciling on natural dyed (tea and coffee) fabric.


I'm using purple and yellow acrylic paints and a stencil brush.


This while waiting for the screen printing supplies to arrive.  The bulb in my thermofax machine died and is no longer available, so on the advice of some trusted artist friends I've purchased Jacquards drawing fluid and filler to make silk screen designs.  The upside to this is I'll have large screens for screen printing natural dyes onto the cloth.

Patternless Skirt


Almost finished, the waste band and hem are next.


Natural, Indigo, and Rust dyed cotton muslin fabric.


It should have taken 45 minutes to construct from start to finish but since I accidentally sewed it together (wrong sides) twice it took about two hours!  So I decided I'll finish the waste band tomorrow and think about how I want to finish the hem.

Why I don't Eco-Dye My Fabric

Why I don’t Eco-Dye Fabric
I do, however, dye, paint, and print, my fabric with natural dyes.

Photo courtesy of the Main Street Cultural District Ames, Iowa.

I participated in a local art walk last Friday and after three hours of questions about my natural dyed scarves, artwork, etc., I am once again reminded as to why I don’t call myself an eco-dyer, for the most part nobody is interested in the craft of eco-dyeing! 
While most people play lip service to protecting the environment, sustainability, fair trade practices, and all things “green” the fact of the matter is when most people found out that I was using tree bark, mushrooms, leaves, bugs, and other stuff to dye my art cloth the response was an overwhelming “that’s nice” or “that’s really cool”.  "That’s nice" is the kiss of death, it's the Mid westerners version of “so what” or “who cares”!

The whole experience solidified in my mind what I already knew, while there are some that are truly concerned about the environment and sustainability, the majority only cares if it saves them a buck or two.  Which leads me back to why I don’t eco-dye my fabric, fibers, and threads, but in fact dye them with Natural Dyes, to me it’s about the process and the relationships I form with other dyer’s, and most importantly with nature that surrounds and inspires me. 

Natural dyed silk scarves.

For me the process is not about immediate gratification, but about discovery, learning, exploring, and most importantly relationships.  Unless a local woodworker gifts me a bag of wood chips from their dust collection system or from their lathe turnings, the wood, barks, and roots I use to create my designs are collected over a period of years, often time’s decades. 

My finished artwork was a hit with everyone with plenty of people telling me they’d love to be able to stitch and sew like I do and do I teach classes?  The evening wasn't a total bust, I got plenty of hits from women of all ages that are interested attending a stitching party; the older women of course were very excited about the wine aspect of said parties. 

Click here to learn more about eClasses, Workshops, and my newest offering Out of the Box Art Parties!

Mark Making with Nature Video Series

Mark Making with Nature Video Series
Beyond the Ordinary in Surface Design


Digital Video Series 

This video series is available as a digital download from Vimeo.com!

Part One:
  • Getting Started
  • Painting with Natural Dyes & Gutta Resists
  • Creating a mono chromatic painting with Natural Dyes
  • Bound Resist

Part Two:
  • Other Resists, using tape as a resist, etc.
  • Monoprinting with objects.
  • Screen printing with Natural Dyes
  • Stamping and More with Natural Dyes

Part Three:
  • Bundle and/or Compost Dyeing
  • Other Bundle Dyeing techniques
  • Mixing Surface Design Techniques (painting, resists, etc.,) to achieve gorgeous cloth!

Part Four:
  • Making the Gum Tragacanth Binder
  • Using textured brayers to make marks on the cloth
  • Screen Printing using resists and non traditional techniques (a variation on deconstructed screen printing)

  • Monoprinting with found vegetation such as grasses and leaves.

Natural Dyed Hexagons


Natural, compost (bundle), and rust dyed cotton fabrics.  The dark red was obtained using a Turkey Red recipe.


I started these hexagons using my natural and compost dyed fabrics in March of 2005, the weekend my mother died actually, and found them last night while I was looking for a missing stack of colored papers.  This couldn't of happened at a better time as I am currently working on a new body of work called "Faded Memories: Stitched Stories of the Prairie and Plains" for an upcoming solo show at the Sanford Museum in Cherokee, Iowa.

This new body of work will encompass both traditional and digital techniques, and to say that I found these hexies made up already would be an understatement! The hexagons are from a pattern known as Grandmother's Garden, which seems rather appropriate for this new body of work!

WIP ~ Sandman


WIP ~ Sandman
4x6 or so inches
Natural and rust dyed cotton scrim atop monoprinted muslin fabric.  Hand stitched with natural and commercial dyed cotton threads, wool batting.

I will be adding some machine stitching next and then will go back into the piece with more stab stitching, maybe layer some more cheesecloth onto the surface and then add french knots and some coils.

This is a small piece I started around 7pm this evening designed to get me back into the habit of stitching as I have a solo show to prep for that I'll be hanging in April, most of those pieces will be machine stitched and then waxed (encaustic).

Introductory Sale Mark Making with Nature Ends January 31st!!!


Introductory Price 
(Ends January 31st)

Mark Making with Nature Video Series
Own $39.95 or Rent $19.95 

Click here to learn more!!!

Tired of your fabric looking like everyone else's?  In this video series I will teach you how to push the limits using natural dyes and traditional surface design techniques!